Instructions: Assembling your Needak Stabilizing Bar
The stabilizing bar is an invaluable tool if you need a little extra support while bouncing on your Needak.
Please ensure you read all the steps and thoroughly understand the instructions before you begin to install your stabilizing bar on your rebounder.
Tools required: 1 x long screwdriver
1) Choose two legs:
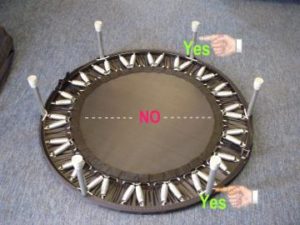
Place your rebounder, unfolded, on its back, with the legs pointed upwards. Choose any two legs separated by one leg.
2) Remove rubber leg tips from chosen legs:
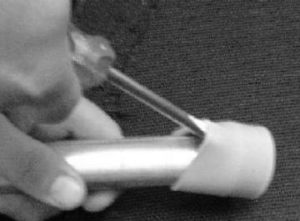
Remove rubber leg tips from two legs of the rebounder. Tips may be removed by cradling the leg in your fingers and pushing them off with your thumbs or with a screwdriver as shown. (Do not slip with the screwdriver or you may injure yourself or damage the jump mat). Tip: Apply petroleum jelly to the inside of the leg tips for easier replacement.
3) Attach sleeve to legs:
Slide the vertical bar/sleeve over the rebounder legs and replace the leg tips.
4) Position spring buttons:
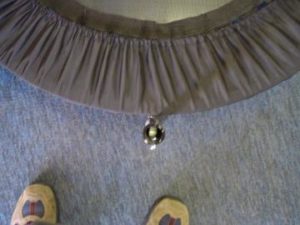
Position bar legs so the spring buttons are pointing away from the rebounder frame. Note: During shipment, the spring buttons may slide away from the hole. Use a needle nose pliers to retrieve the button and reposition.
5) Assemble the bar:
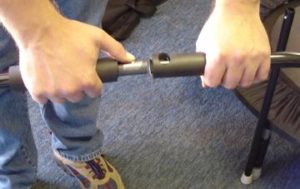
Connect the two curved pieces that form the top of the stabilizing bar. Both pieces have a series of 3 holes which indicate the bottom of the bar. These are adjustment holes to set the height of the bar. Looking to the other end of the curved pieces you will see that one of the pieces has a spring button. The other has a single hole. Depress the spring button and push the two pieces together while twisting slightly until the button and hole match. The snap button should pop up through the hole uniting the two pieces.
6) Determine the front:
You next need to determine the "front" of the stabilizing bar. When standing on the floor in front of the rebounder, the spring button will be to the left of the joint where the two halves meet. (When standing on the rebounder it will logically be on your right.)
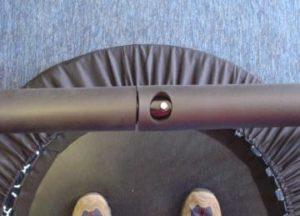
And now your stabilizing bar is ready! Remember that it is not made to carry weight, but rather be used as a guide for stabilization.
For more information and a video guide, visit Needak Manufacturing directly at: https://needakrebounders.com/how-to-assemble-your-stabilizing-bar/Disclaimer: Please note that all the instructions provided on Needak.com are for informational purposes only and serve only as recommendations. Any use of these instructions or images is done at your own risk, and you defend, indemnify, and hold harmless Needak.com from any responsibility towards damages caused to you or any third parties as a result of your viewing or use of the information found on these pages. It is recommended you take all necessary precautions and familiarize yourself with the task you are attempting independent of the instructions on these pages.


